One
of the most disappointing
aspects of the GWS Pico
Moth has been the stock
2 piece cowling that comes
with the kit. Not only being
cumbersome to join but the
plastic itself is extremely
brittle and tends to crumple
beyond use on its first
impact with a hard surface.
What I did was use the kits
cowling as a template to
produce my mold by using
sticky tape to close all
the holes including a raised
ring around the rear of
it to extend the mold past
the rear edging. I then
stood it on its nose and
filled it with Plaster of
Paris. I also inserted a
short length of large diameter
dowel into the centre of
the plaster while wet to
provide a handle to use
when working with the mold
later.
Step
1 - The bottle
I select any bottle that
meets the size requirements.
I aim for a diameter that
allows a small amount of
space all around the mold.
Since 1.25 litre soft drink
bottles are readily available
in my household, they get
used the most often.
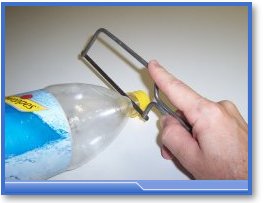
I start
by cutting off the neck
with a small cutting saw.
Then I
peel off the label and cut
the bottom of the bottle
off using a pair of large
scissors leaving plenty
of excess plastic.
Step
2 - Tools to Use
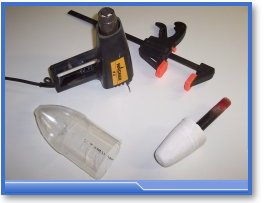
The only tools I use in
the formation of the cowling
is a heat gun and a Clamp
. The heat gun is the type
sold at hardware stores
that can be used for paint
stripping. It gets very
hot and can easily scold
so be careful. The Clamp
type I use is the one that
has a tension trigger so
you can squeeze the clamp
tight with only one hand
- it makes the job easier.
Step
3 - Creating the cowling
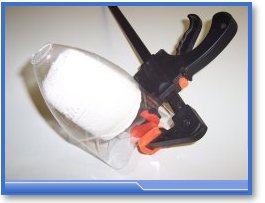
Firstly, insert the mold
into the bottle and align
the prop hole area as closely
to the neck opening as possible.
Then clamp the other end
of the bottle to the handle.
If you didn't make a handle
- the plaster is strong
enough to allow you to clamp
the bottle to it without
breaking. I have done this
with this actual mold without
incident. I do stress clamped
- not tightened beyond belief.
Step
4 - Heat shrinking the
bottle
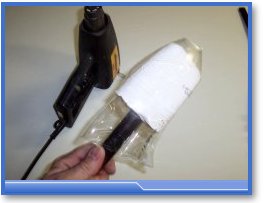
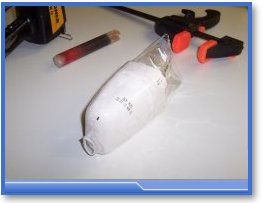
The clamping of the plastic
stops the bottle from shrinking
past the end of the mold
- as it will do - trust
me! Once you heat shrink
the end of the bottle around
the base of the mold you
can remove the clamp. This
also allows for easier manipulation
of the mold as you will
be constantly turning it.
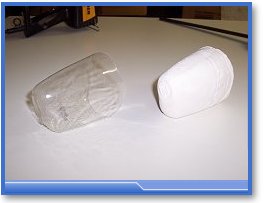
Apply heat with a back and
forth motion all over the
bottle area to uniformly
shrink the bottle until
it is nice and tight against
the mold. I try to catch
the light against the surface
and look for ripples and
bumps and work my way around
in a final hunt for them
so the surface ends up nice
and smooth. You should end
up with a result as in this
image.
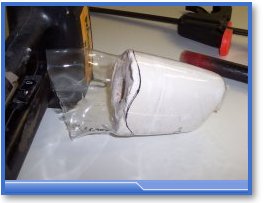
The next step is to
draw the cowling outline
from the imprint the original
left on the mold. Do this
before removing the mold.
Step
5 - Removing the Cowling
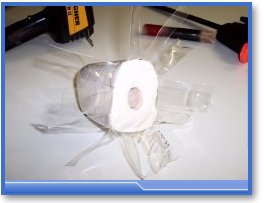
Because we shrank the
bottle over the mold we
now have a really tight
fitting result at the
rear of the cowling. What
we have to do is cut the
plastic multiple times
to make removing the mold
easier. What I do is peel
the plastic to just past
the edge but not past
the outline I just drew.
By doing this - its like
peeling a banana. Now
cut the extra plastic
away. The mold will still
be on real tight so you
have to push it out forcibly
using any handy tool that
wont damage the plaster
via the neck hole. I use
the rubber handle of a
small pair of pliers.
I also put a scrunched
up towel on the table
to catch the mold when
it 'pops' out so it doesn't
get damaged.
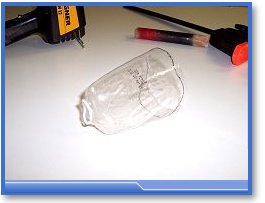
You should be left with
something like this now.
Step
6 - Completing the cowling
To complete the cowling
I use large scissors to
cut along the outline
I drew earlier, then sand
out any rough snips to
finish it into a nice
curve.
I then cut the front
excess off using a modelling
knife.
Step
7 - Final steps and
painting
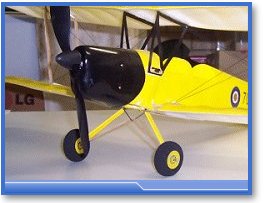
The final steps are
to take the new cowling
and place it onto your
Pico Moth. When in position,
mark where the screw holes
are and remove the cowling
and drill the holes to
suit.
Now you can paint it
and mount it back on your
model.
Congratulations, You
are all done!
Hosting, Web Design
and Maintenance by Nitrocharged..... nitrocharged.com
 One
of the most disappointing
aspects of the GWS Pico
Moth has been the stock
2 piece cowling that comes
with the kit. Not only being
cumbersome to join but the
plastic itself is extremely
brittle and tends to crumple
beyond use on its first
impact with a hard surface.
What I did was use the kits
cowling as a template to
produce my mold by using
sticky tape to close all
the holes including a raised
ring around the rear of
it to extend the mold past
the rear edging. I then
stood it on its nose and
filled it with Plaster of
Paris. I also inserted a
short length of large diameter
dowel into the centre of
the plaster while wet to
provide a handle to use
when working with the mold
later.
One
of the most disappointing
aspects of the GWS Pico
Moth has been the stock
2 piece cowling that comes
with the kit. Not only being
cumbersome to join but the
plastic itself is extremely
brittle and tends to crumple
beyond use on its first
impact with a hard surface.
What I did was use the kits
cowling as a template to
produce my mold by using
sticky tape to close all
the holes including a raised
ring around the rear of
it to extend the mold past
the rear edging. I then
stood it on its nose and
filled it with Plaster of
Paris. I also inserted a
short length of large diameter
dowel into the centre of
the plaster while wet to
provide a handle to use
when working with the mold
later.